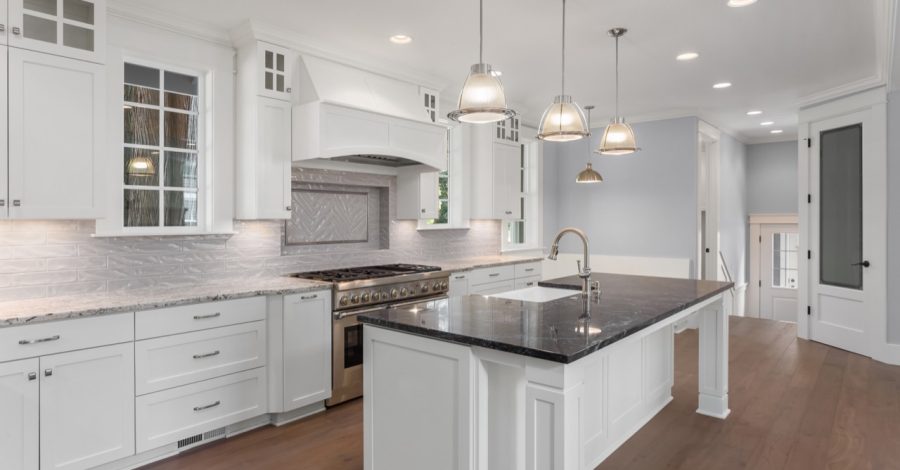
Styling your kitchen cabinet is one productive way of passing your time at home. You can transform your kitchen area in a few hours as you listen to your favorite playlist Experts show that you can easily organize the cabinets once and for all by doing simple DIYs. The basis of the tasks involves time management in three phases; decluttering to pare back essentials, mapping providing the blueprint for cabinet upkeep, and styling that allows you to express your art on the cabinets. Let’s look at how to organize the cabinet by each stage like a pro.
Decluttering
Step 1: Prework
It is the master plan of how the steps to accomplish the tasks at hand. It prepares you for the task ahead by deciding the time duration for each task to be performed in the kitchen. You can allocate each task one and a half to three hours, depending on the activities involved. Some of the things to have in advance are garbage bags, laundry bags, and an assortment of cleaning items.
Use garbage bags to place items no longer needed in the kitchen. Place the items to be disposed of separate from those in a better condition and can be donated. Place kitchen items in laundry bags for rearrangement or moving to other parts of the house. Have a variety of cleaning items and agents to clean and wipe the surfaces as your continue working.
Step 2: Remove all items from the drawers and cabinets
Remove everything from the cabinets and drawers and place it on an empty dining table or countertop. To make your work easier, place the items in sections depending on where you took them from the cabinet and drawers, for example, upper, middle, and lower shelves placed separately. Ensure you have enough working area before removing the items to avoid breakages and mix up when kept in sections.
Step 3: Evaluation
It is a critical stage in determining what is often used in the kitchen and not. Conduct an assessment of the frequency in which you use the items in the kitchen, and some tips include the times your cook, method of cooking and utensils used, and kitchen items that are no longer in use. Rearrange the kitchen items based on these criteria after answering the leading questions.
Step 4: Separate similar items
You may have several kitchen items, but you don’t need or use all of them in any given context. Pick what you need in the kitchen often from the several types of each kind, for example, eight to ten dinnerware pieces in a category. Afterward, decide to keep the rest for use in the future or give it away to people in need.
Mapping
Step 1: Set the scene
Begin by deciding where to place the categorized items in the cabinet. As you think of the new rearrangement, remember the earlier setup and consider factors like items you use most and whether you are right or left-handed for easy retrieval. To avoid forgetting, note the arrangement in the post-it notes and follow the guidelines in the next step.
Step 2: Plan for each part of the cabinet
Any of your chosen kitchen cabinet layouts must follow these two important guidelines;
Group by zone: The kitchen incorporates five zones. The consumable area contains the pantry and refrigerator and is near the clean-up and preparation areas. The non-consumable area stores small appliances, plates, cups, and eating utensils, found near the clean-up area. The clean-up contains the sink, dishwasher, and bins are near the consumables, non-consumables, and preparation areas. The cooking zone is where the magic takes place, and it has the hob and oven. The ideal location for the cooking zone is near the preparation and consumable zones. The preparation zone includes the rooftop for food preparation, and it should be near the consumables and clean-up zones. Keep the most used items in each area with your arms reach and those rarely used further away.
Group by type: Place the items on different levels based on the material, place glassware and ceramic items on separate shelves in your cabinet. Have groupings of similar kitchen items placed on one kitchen cabinet for ease of access. Remember to note weight that heavier items go on lower shelves and light ones on upper shelves.
If the above guidelines are inoperative in your kitchen, use the ‘golden triangle’ theory that suggests that a kitchen has three main work areas-stove, sink, and fridge, and should form a triangle when placed accordingly. Map your available space, and any easily movable appliances rearranged to form the triangle.
Styling
Step 1: Avoid dead space
Areas of the cabinets that appear empty make the kitchen unappealing. Make use of every space by being innovative. For example, use risers to make plates and spices stand out in the cabinets, especially on tall cupboards. You can also use turntables to separate appliances and small kitchen items in deep cabinets.
Step 2: Store large items
Pans, pots, and baking sheets which are large and heavy should be stored vertically in the lower cabinets. Use an expandable organized that fits all your stuff, from deeper trays to lids.
Step 3: Design your most used dinnerware
What you often use should be given outermost consideration to access and appearance. Bowls and platters in plate racks on open shelves create a catchy look in the kitchen. Make the space more attractive by placing matching plates, glassware, and mugs together.
Step 4: Decant dried goods
Much of the dry goods in the kitchen come in boxes which make the space unattractive. Use airtight glass containers that show the quantity inside to store food items instead of using boxes. Create more space on the cupboard by moving often used food items to the counters and placed in beautiful jars to be easily noticeable.
Step 5: Make it eye-catching
Finish the process by making your kitchen space more attractive. Create that impression of an organized kitchen cabinet by including fresh flowers, potted plants, art, and other objects, in a doorless look kitchen. Other items that you have and did not find a space for display can go to the kitchen walls and floor.

Leave a Comment